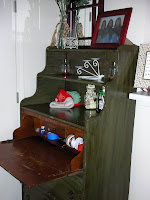
First, a little background: I have two kittens (Simba and Daisy) and one dog (Mosley). Mosley is in the habit of eating ANYTHING he can get into his little mouth, especially cat food. I had been feeding the kittens atop my dining room table since I got them, but I wanted my table back! The solution? I bought this beauty ------------------>

...with dreams of turning it into this
<----------------------
(see the post
here) but decided I liked it as it was (for now). I was still stuck with the problem of where to feed the kitties...
While looking at my bookshelf, the idea hit me, make the bottom a feeding spot for Mosley, and the top, for the kitties! Since my dad was already heading over that night to bring me a new wireless router (yes, he is THE BEST) I asked him to bring a saw along; sadly, I don't have one of my own. Randomly, I had just pulled out a box with old fabric/curtains in it earlier that day and decided I wanted to cover part of the bookshelf to store other things I don't want my little animals to get their paws (or mouths) on. I busted out the saw (once my dad came), scissors and hot glue and began! **Note, the idea for the fabric covered section originally included SEWING the fabric together, but who can be bothered with going to buy a sewing kit when I wanted to finish this project right now!? Hence, the hot glue :)
Memo to self: get some tools and at least some needles and thread!
Here it is:
And now I can use my dining room table for things like crafting!!
PS. I even ended up using the middle shelf for my billions of books from school!
I linked this project up with A Soft Place to Land!
 {roomenvy}


